Rainbow Ink Backgrounds and Stamps
Hi!


Stamps
Today I am sharing my video for the rainbow stamping technique, and all the images and backgrounds I made using the same technique.
My video is linked here. It shows all the techniques, supplies and inks I used, as well as tips and tricks to use all the extra ink you are left with on your stamps or inking sponges. Please head to my video to see the technique as it is much easier to show and tell than type!


These are images that I stamped a few months ago when trying out this inking technique, and they are what inspired me to re-visit the technique this week and stamp a batch of images that I could use as thank you or encouragement cards during the global pandemic. Rainbows have been a symbol of hope and thanks during this strange time, so I felt some bright cheery cards using rainbows would be a nice thing to make at the moment to cheer people up.
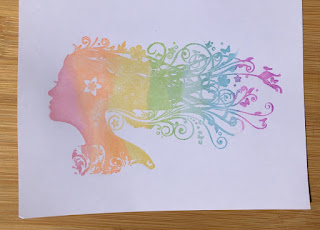
Both the lady and unicorn images are stamped with Catherine Pooler Designs Premium Dye Ink Pads, but this technique should work with most dye based inks. Colours and stamps used are listed at the end of this blog.
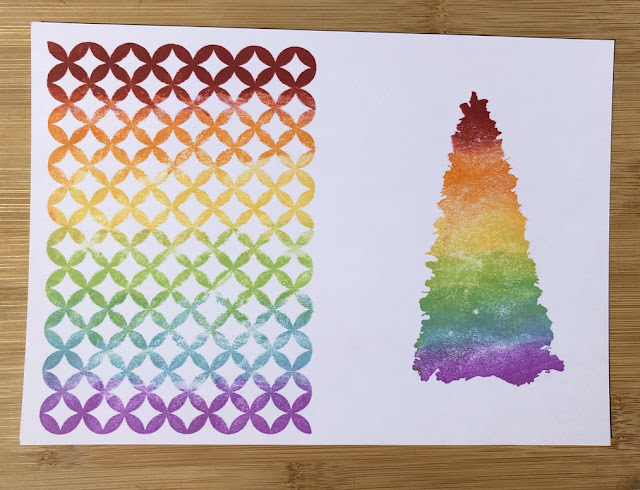
This was stamped with Altenew Crisp Dye Inks, it isn't the best result I got, but I wanted to include it to show the results anyway. It was a very hot (28C) day when I did this and the ink was drying too fast for me to attempt stamping both large images at the same time, and of course my card shifted while I stamped so I have a bit of a shadow image, but I am still going to make cards with these images. The tree had water sprayed on the stamp at the end to give an even fuzzier look since I had a shadow already.

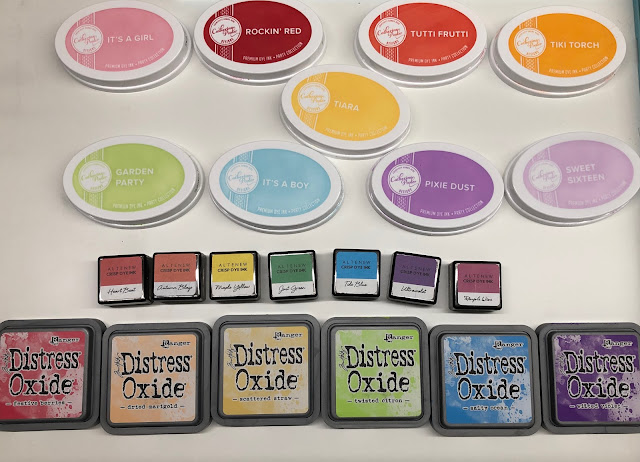
On this image I only used four colours on each stamp. The top has red, yellow, blue and purple (Altenew inks), but hopefully you can see how the colours mixed to give orange and green in my rainbow - I did forget to blend a bit on this one, which is way there is such a defined line on the colours.
The second used pink, yellow green and purple inks (Catherine Pooler inks), and again you can see how they blended to make green and orange, in fact the yellow has all blended with the adjacent colours and can no longer be seen.
I used the same technique here, using three primary colours, purple and a pinky purple ink (Altenew ink here), again you can see the lovely blended orange and green from the over-lapping inks.
These images were stamped with Distress Oxide inks, which are a mix of pigment and dye inks and are quite opaque. In retrospect, they probably aren't the best inks for this technique, and the original Distress inks would probably have worked better. These inks tend to sit on top of each other when stamped, rather than blending (you would need to mix them like you do with a brush or pad), so while it does work, I don't think I would use this ink for this technique again.
This is the image I got by spraying the Distress Oxide ink (left on my stamp overnight!) with water and then stamping it - it actually blended really nicely one sprayed with water, and has given this lovely water colour effect on the Warm Mushroom smooth card stock I used.
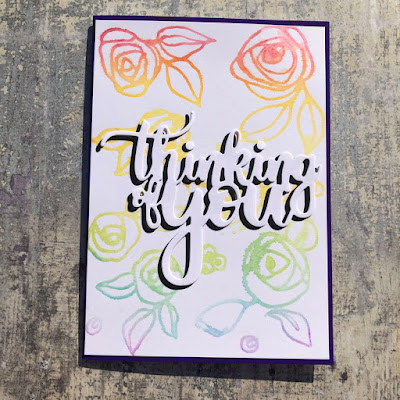
This was another two for one set of stamping, using Catherine Pooler inks on the Altenew Bamboo Roses stamps. The images on the right are the original stamping, and I simply turned my card, sprayed my stamps with water and got the lovely watercolour images on the left when I stamped for a second time. I think there is an error in my video with the colours used on these, I think the blue is 'Aquatini' not 'It's A Boy' as I said.
These were stamped with the Catherine Pooler inks again, and as I show in my video, I actually used the ink left on my sponges from this technique to get a stencilled rainbow using what would usually be wasted ink!
Here's the stencilled background image using the excess ink, and I even got another pair of images by spraying the stamps and taking another impression.
Excuse the pebble, it was rather windy when I was trying to take photos in the natural light today!
Another lovely watercolour impression, so that's hopefully 5 cards from one set of inking/ stamping/ stencilling with waste ink!
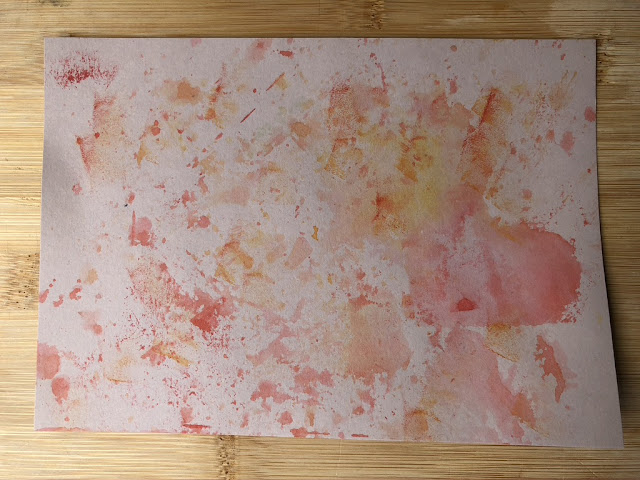
My last set of backgrounds was simply to show that you don't need to make a rainbow with this technique, you can stick to a few colours like the oranges and yellows (from Catherine Pooler) that I used to create this lovely autumnal leaves background. Again, I inked once for the impression on the left, then rotated my card, sprayed my stamps with ink, and got a second watercolour impression from the same ink.
As I had over-inked a little and got ink all over my stamping platform, I had removed my stamps and sprayed with more water and had a 'smoosh' about to get all the excess ink onto another piece of card. Can you tell I don't like to waste my ink?
I'll come back next week hopefully with some finished cards using all these lovely images, so I hope you will stop by again to see them! Stay safe.
Lesley x
Supplies
Inks
Catherine Pooler Designs Premium Dye Ink in:
- It's A Girl
- Rockin' Red
- Tutti Frutti
- Tiki Torch
- Tiara
- Garden Party
- It's A Boy
- Pixie Dust
- Sweet Sixteen
- Aquatini
- Mint To Be
- Melon Ice
- Bellini
- Heart Beat
- Autumn Blaze
- Maple Yellow
- Just Green
- Tide Blue
- Ultraviolet
- Purple Wine
Ranger Distress Oxide by Tim Holtz ink in:
- Festives Berries
- Dried Marigold
- Scatter Straw
- Twisted Citron
- Salty Ocean
- Wilted Violet
Indigo Blue cover gift from Simply Cards and Papercraft (old set)
Visible Image Believe in Unicorns
Crafti Potential Chevron A6 Background stamp and Square Circle A6 Background Stamp
Altenew Sketched Evergreen, Bamboo Rose and Halftone Circles
Layered Peonies cover gift from Simply Cards & papercraft issue 203
Wildflower embossing folder and stamp set cover gift from Quick Cards made easy in 2016
Royal & Langnickel Leaf decor stamps (a really old stamp set, my first ever clear stamps!)
Stencils
Craft Sensations Deco Stencil Set (available at The Range in the UK)
Generic Trellis stencil bought from Farnborough Craft Fair this year, but I don't know the company
Card
Sheena Douglas 300gsm white stamping card
Limetree Craft 220gsm Smooth card in Warm Mushroom
Tools
Stamping platforms:
Tonic Studios Tim Holtz
My Sweet Petunia MISTI
Be Creative (A4)
I used multiple and set up different stamps in each, but you only need one!
Cheap makeup sponges I think mine were from a pound shop, but possibly Wilkos!






Comments
Post a Comment