
Rainbow cards and batch-making tips
Hi,
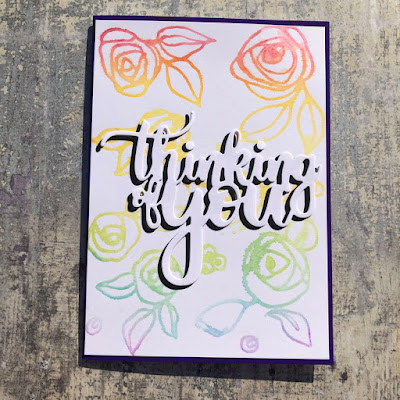


Well after a hectic half term week with my girls getting no work set from school (I can't really say 'with them at home', as they haven't been to school since March like most kids in the UK), I have finally managed to finish making cards from all the backgrounds I made with my rainbow technique. I made 27 cards in total, with only the two stamped flowers not being used (they are still in my bits box!) This was my favourite in the end.
It took a few sessions, and I didn't film it as it was all fairly basic card making, but I have included pictures of all the cards and some tips for batch-making cards, even when you are doing lots of different designs.
Tip 1 - Pick a regular size (A6, 6"x6" etc.)
I did do a bit of pre-planning before I made all my backgrounds, I cut all of the card I was stamping on to UK A5 before I started and either stamped two different images on them at the same time, or stamped one side and rotated to get my second impression, My favourite card above was a second impression simply from spraying my stamps with water to get the excess ink off. If you would like to see how I created all these images, head to my video here.
The first thing I did with all my A5 panels was cut them in half, so now I had 23 A6 panels (I had one blank half that I hadn't stamped on), plus the 6"x6" panel that I had from the excess ink stencil technique. This is the only card that isn't the same size as my other cards, and the only one I made alone, as I couldn't bring myself to cut the panel down to A6!
 |
| The only 6"x6" card, using a ready made blank |
By sticking to one size I could either use one size of card blank, or make a batch all the same size. This also means you can stick to just a few sizes for cutting up and you are less likely to make mistakes if you have one set of sizes in your head. I also buy envelopes in standard sizes (I will use C6 size for all of the cards I make in this batch), so bear in mind the envelope size if you aren't using pre-made blanks and envelopes.
Tip 2 - Use coloured card bases rather than matting
Matting and layering takes time, but I wanted my cards to be bright and colourful, with a pop of colour to bring out the colours in my stamping, so I made my own card blanks from coloured card. This is perfect for printed card, that is white with a colour on one side. I used Jellybean Crafts Rainbow pack of 235gsm A4 card (this was a Show Special of 100 sheets in 10 different colours that I picked up at the Farnborough Craft show earlier this year). I pulled out two sheets of all the colours that toned with my stamping (I didn't use the dark green, red and brown), meaning it would look like I had matted all my cards, but it is simply the card base giving the colour.
This is 28 card blanks, 4 each of 7 colours, ready to go after cutting and scoring, which leads to tip 3!
Tip 3 - Do all the same steps at the same time.
This is obvious, but it really does speed things up. Do all the cutting, for all your cards, then do all the scoring, then all the die cutting and so on. It's much quicker than making one or two cards at a time. Even though these cards are all different, I could still make them this way.
I finished the stamping on my panels that needed a bit of over stamping (the rainbow trees), made all my card blanks, and then cut down my panels, all in batches. I decided on three different sizes, one using a die to make a smaller panel with a stitched edge detail, and then a couple of sizes I cut on a small guillotine, depending on whether I wanted to keep most of the panel, or have a larger border around my panel. I sometimes put a pencil or tape mark on my guillotine to cut batches of card to a specific size without having to find the measurement each time, you can just see a pencil mark in this picture.
I now had a pile of card blanks and panels ready to make in to cards. Don't throw away wider off-cuts, they come in handy later...
Tip 4 - Stick to just a few card designs
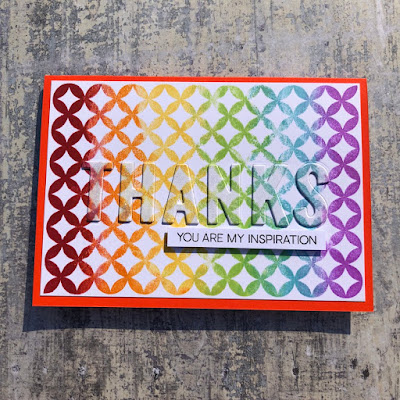
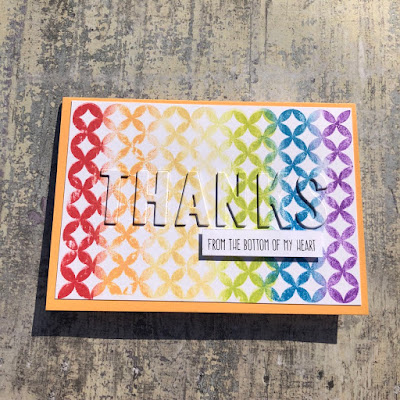
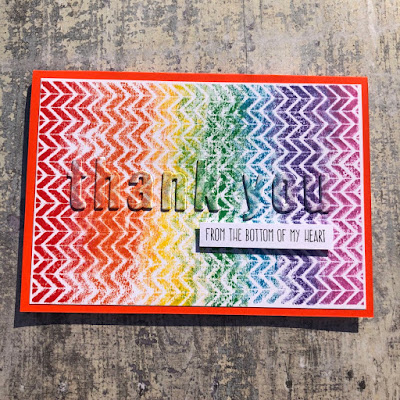
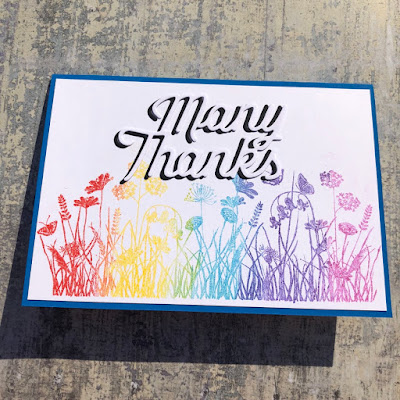
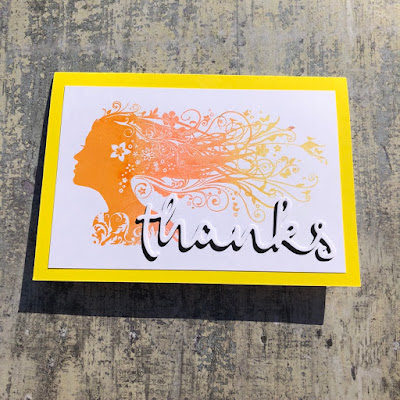
Again, this is obvious, come up with a few designs and use them on all of your cards. I had three basic plans. The first idea was for my more solid background stamp panels. I used the eclipse design, using die cut letters to cut the words out of my panel, and then raising these on layers of die cut letters. To speed things up, I used three different sets of letter dies and spelled out 'thanks' or 'thank you', and stuck my letters on to low-tack tape, nicely lined up using a ruler.
Then I grabbed all my white card scraps and cut piles of letters, all at the same time in one pass through my die-cutting machine. I was careful to keep the letters in their sets to make sorting them easier at the end. Then it was simply cutting the words out of the panel, and gluing piles of letters together. I used 4 layers under each letter.
Tip 5 - Use up your 'saved' bits and pieces while batch-making
I tend to 'play' and make extra panels when I stamp something, and I don't always make everything up in to a card, so my tip if you are batch making is to check through any bits you have and see if they lend themselves to what you are doing. Even pre-printed toppers or bits of patterned paper can get used up this way. I had a similar stamped panel so while everything was set up with my letters, I used is up as well. I had cut 28 card blanks, and had 23 panels, so I knew I had spare to play with.
Tip 6 - Use your off cuts for ready cut sentiment strips
Remember the pile of strips I had from trimming my panels down? The wider ones are the sentiment strips on all of these cards, it saves on card and time as they are already cut into strips.
These eclipse cards probably took the longest to make, simply because it took time to set up the letters and glue all the layers together. I could have made it faster by using a single layer of funky foam under the letters, but I like using up all my card scraps, and it also means the card can be recycled more easily if the recipient wants to recycle it.
Tip 7 - Use all your cutting plate
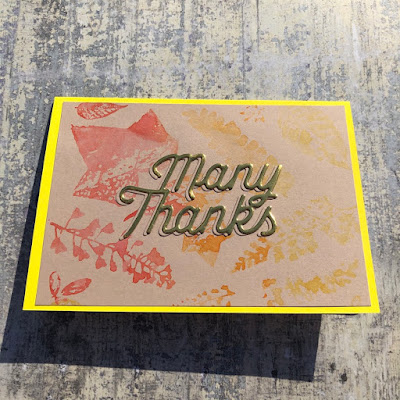
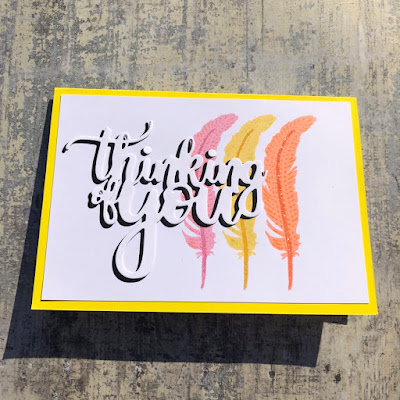
The next card design was simply to add a die cut word on top of my images. I went through all my dies, and found all sentiments I thought I could use on these cards. I laid them all on my A5 die cutting plate filling it, and cut two sheets of white and two sheets of black. So from 7 sentiment dies, I had 14 sets of 2 layer sentiments in only four passes through my machine, a huge time saver.
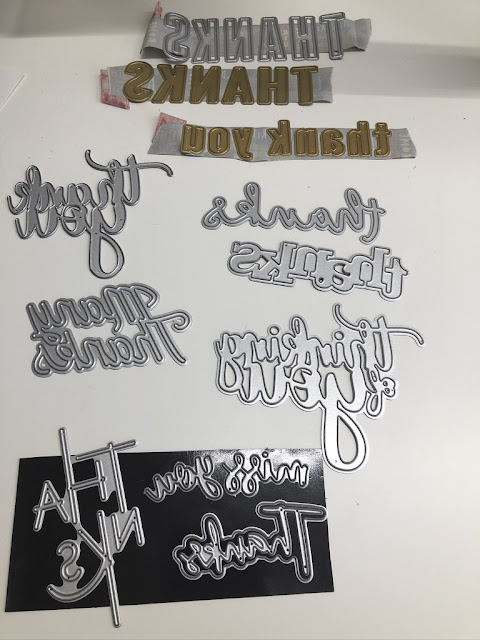 |
| All the dies I used on these cards |
Then it was a pretty quick job to stick all the panels to my cards and add a sentiment with its shadow to each card.
I decided that a few of my cards needed something other than black and white, so I did go back and cut a few extra sentiments from scraps of silver, gold and the same warm mushroom I had used for my stamped panels.
Going back to 'Tip 5' I had some stamped feather panels in colours that toned with my left over card blanks, so I used them up with the same black and white die cut words.
Tip 8 - Try to use up everything you create
Despite saying I have a box of bits I have made and not used, I do try to use everything I create (eventually!), so for the paler backgrounds and even my 'smooshed' extra ink backgrounds, I used a really simple technique, cutting the word from the panel and simply letting the coloured card show through - simple but effective if you have a decorative die like the thin 'Thanks' die I used here.
The final card started out as an eclipse card, but it didn't work well as it was too pale in the centre, so I simply left the letters out, letting the card show through. I might even use the left over letters on another card, giving a 2 for 1 on this card (they are in that bits box now!)
So that's it, 27 cards in total! 23 cards from my rainbow stamping, plus 4 from the extra panels from my bits box. The only thing I have left is the two small flowers I stamped, they didn't suit the techniques I was using on these cards, so they have gone in the bits box for another day!
If you would like to know what any of the dies I used were, please comment and ask and I will try to work out what they are - I keep all my sentiment dies in one big folder on magnetic sheets, so have to work from memory or hunt out the images online, unless I had the sense to keep the packaging 😂
If you want to know what stamps I used, head back to my previous blog post here to see a supply list.
Thanks for stopping by, and I hope the tips were helpful! Stay safe,
Lesley x
Bonus Picture for sticking with me through this long blog, my craft room companions, working hard as usual....


Comments
Post a Comment