
Left over letter die-cuts cards!
Hi!
Remember those left over die-cut letters I had? Well being a crafter, I throw nothing away (much to my husband's annoyance ;P) so I thought rather than putting them in my bits box, I would make a couple of cards straight away to use them up. Again my inspiration came from a Jennifer McGuire blog post, which you can find here: 3 WAYS: Alphabet and Word Dies
3 WAYS: Alphabet & Word Dies
This was a simple pair of cards using the same letter dies from Xcut, still taped together, on a stamped panel, using up the left over die-cuts to layer under the letters to raise them off the surface so they stand out from the card.
Today I used the Altenew Tulip stamp set, and various Altenew inks.


Remember those left over die-cut letters I had? Well being a crafter, I throw nothing away (much to my husband's annoyance ;P) so I thought rather than putting them in my bits box, I would make a couple of cards straight away to use them up. Again my inspiration came from a Jennifer McGuire blog post, which you can find here: 3 WAYS: Alphabet and Word Dies
3 WAYS: Alphabet & Word Dies

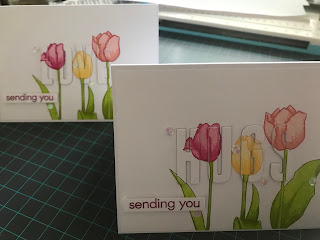
These are the cards I ended up with today
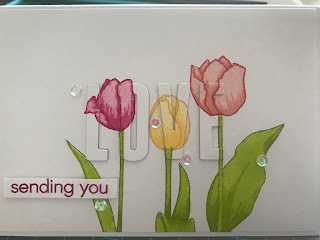
This was a simple pair of cards using the same letter dies from Xcut, still taped together, on a stamped panel, using up the left over die-cuts to layer under the letters to raise them off the surface so they stand out from the card.
Today I used the Altenew Tulip stamp set, and various Altenew inks.

This is what the stamp set looks like, so you can see the various layers
As I was making two cards, and these stamps aren't easiest to line up perfectly, I used a stamping tool which is basically a hinged frame that allows you to line your stamps up. I have a MISTI, but there are lots of others out there.

Here's my panel in my MISTI with the leaf outline, tulip outline and base layer stamped
I worked out where things were going to go and then stamped both panels with each layer of stamps before swapping my stamps out for the next layer.

Here are the finished stamped panels before I die-cut them
Now all I had to do was die-cut the panels using the same taped together letter dies I used yesterday.

I use my grid on my cutting mat and a ruler to get things straight as I am terrible at straight lines!
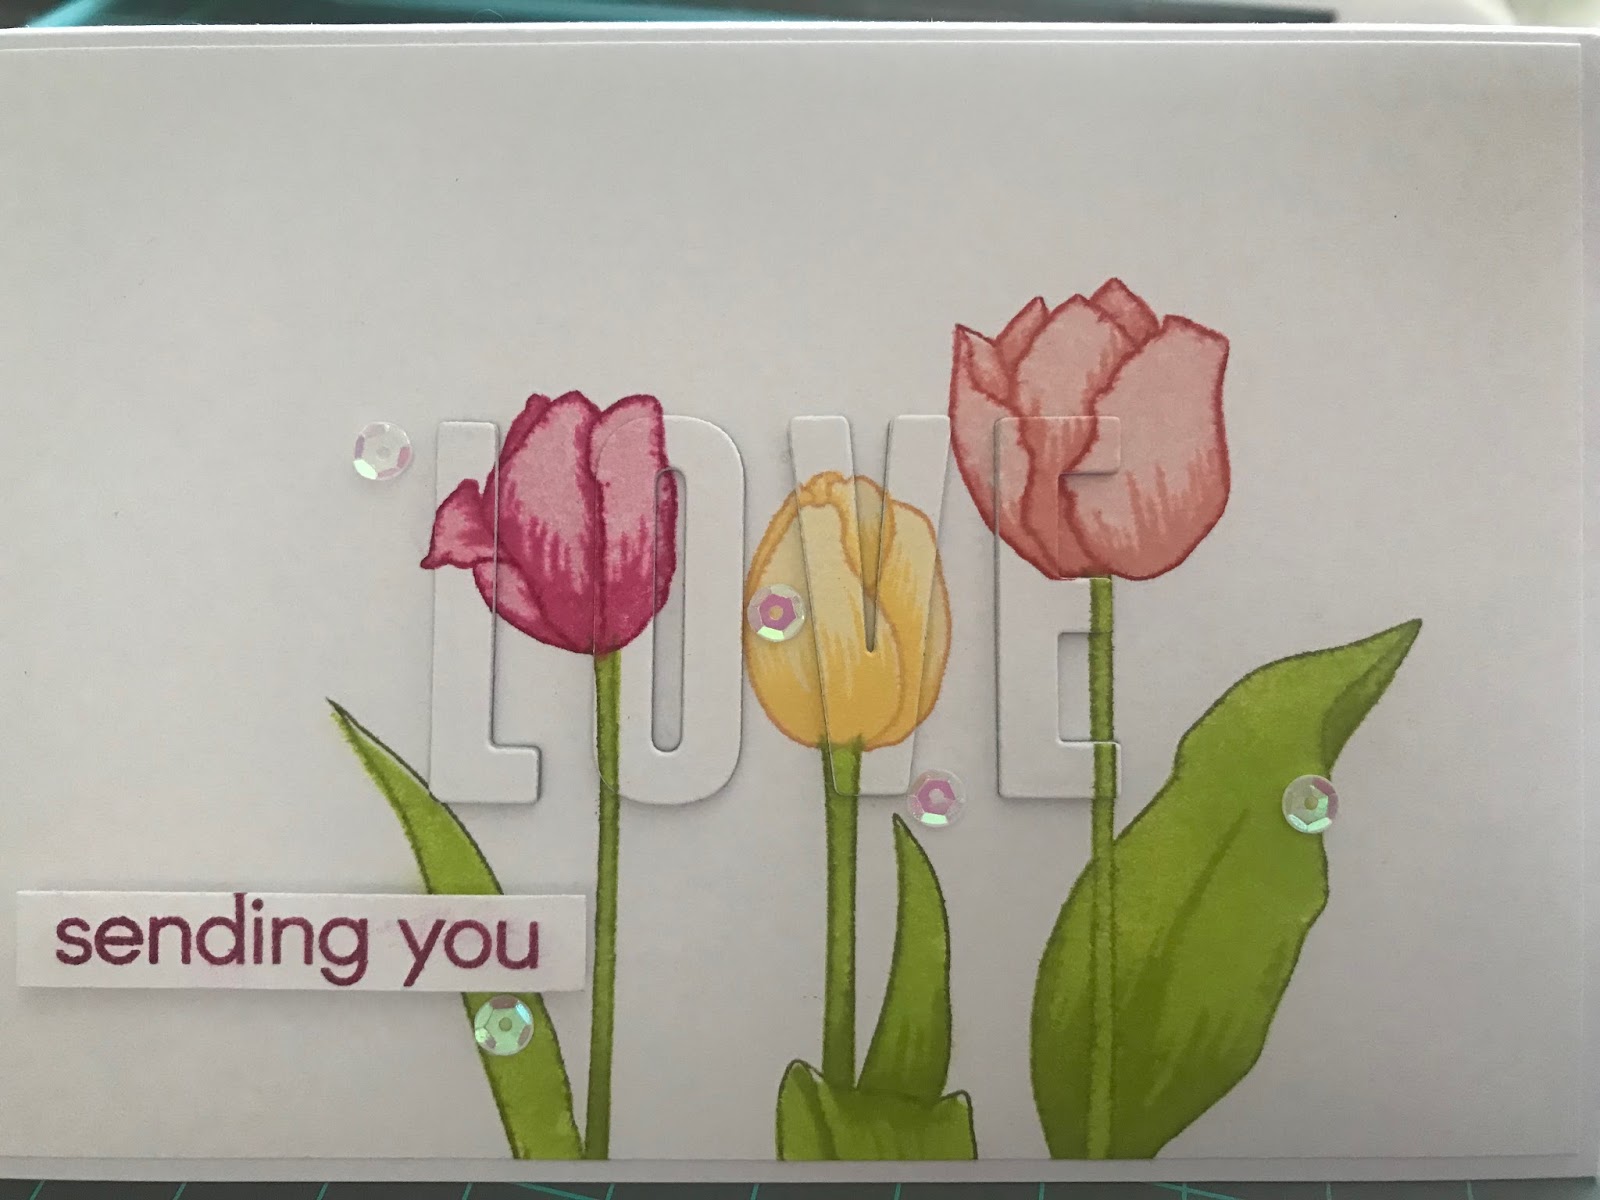
Next I stick all the leftover letters together to raise the letters up and stick the main panel flat to my card, inlaying the centre of the O back in flat to the card as well. While I was doing this, I decided that the 3 layers I had didn't have quite enough height when in-laid back in, so I cut a few more letters from scraps of white card I had in my bits box - being very frugal and eco! I used 6 layers of letters in the end.

Hopefully you can see the dimension the letters have in this photo
Finally I decided the cards needed a little something more for the sentiment, so I used the 'sending you' stamp from the Altenew Tulip set in one of the darker ink colours I had already used to tie it in with the rest of the card. Of course I had to add a little bit of sparkle with a few randomly placed sequins, which serve a multi-purpose to cover up any slight imperfections in the stamping (I think I had something stuck on the solid leaf stamp on the right-hand tulip, which you can see on some of the photos.)

Here are the finished cards
All complete! Once again I hope you enjoyed seeing the creating process today!
Lesley x
Supplies:
Dies
XCut Bold Letter dies, but any letter of larger word dies could be used for the same method.
Stamps
Altenew Tulip
Card blanks, white card, random sequins, glue and Altenew Inks in:
Razzleberry, Rubellite, Pink Diamond
Caramel Toffee, Warm Sunshine, Buttercream
Velvet, Rouge, Blush
Moss, Olive, Bamboo
Tools
Sizzix Bigshot die-cutting machine


Comments
Post a Comment